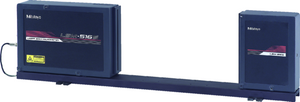
Mitutoyo 544-047 Offers
Make system integration simple with this panel mount design display that supports odd fluted parts, segment, and edge detection. In addition, this display provides readouts for two measurement values simultaneously.
Features
- Displays real-time, multi-channel measurements in a compact unit
- Compact, panel-mount design makes system integration simple
- Controller can be used for multi-unit system configurations for added versatility
- Simple connection to a PC through USB cable
- Standard I/O and analog output interface to connect it to an operation controller or PLC used on a production line
- Standard RS-232C interface for connection to personal computers or printers
- Capable of calculating mean, maximum, minimum and range (maximum to minimum)
- Segment measurement (7 segments maximum) or edge measurement (1 to 255 edges) can be selected
- USB2.0 is provided as standard
- Arithmetical average or moving average can be selected
- Go/no-go judgment function
- Measuring setup memory: The measuring setup can be registered as a program (1 program), saved, and can be recalled with a single operation
- Drill/endmill (odd number flute) diameter measurement: The diameter of drills or endmills that have an odd number of flutes can be measured by changing the parameter setup
- Automatic workpiece detection: Automatically starts measurement when a workpiece advances into the specified measuring area
- Data output interval setting: By setting an interval (between 1 and 999 seconds) to continuous measurement in advance, data output will take place at each specified period of time
- Statistical calculation: With this function, multiple measurements are taken from the same type of workpiece, statistical values are calculated from the measurement results and quality evaluation is executed for each lot
- Multi-limit judgement: In addition to +NG, GO, and -NG judgment criteria limit values from limit 1 to limit 6 can also be set
Preset/offset
Sets the currently displayed measurement value to zero or a specified numeric value. This is useful, for example, if a difference in the diameters of a reference gauge and a workpiece is to be allowed for in calibration, or if a dimension of a workpiece that exceeds the measurement range of the LSM is to be measured.
Mastering
For continuous processing of high-precision workpieces, fine-adjusting the preset or offset value is called mastering. By specifying a mastering value, the total correction will be (zero-set/offset value) + (±mastering value). If a positive mastering value is specified, the displayed value for a workpiece diameter measurement will be greater than the actual value. If a negative value is specified, the displayed value will be smaller than the actual value.
Sample measurement
On a sample measurement, the number of measurements will be defined (in the range of 2 to 999) in advance. From this sample, measurement various calculation results (mean, maximum, minimum, and range) can be derived. These measurements can be used for runout measurements on a revolving workpiece and simplified cylindricity measurements.
Arithmetical average/moving average
Arithmetical/moving average modes are provided to obtain the average of measurement values. On this type of LSM, either of them can be specified before starting measurement. In the arithmetical average mode, the number of scans over which to take an averaging can be set at one of twelve steps between 1 (0.32 ms) and 2048 (0.64 seconds). In the moving average mode, the number of scans can be set at one of seven steps between 32 (0.01 seconds) and 2048 (0.64 seconds), and the measurement value will be updated every sixteen scans on and after the second measurement, irrespective of the specified number of scans for averaging. The latter mode is suitable for judging the trend in the diameter or width of an endless workpiece, such as wire or tape from a measurement that requires a long period.
Automatic measurement using edges
The edges created by scanning a workpiece can be used to program an LSM. A maximum of 127 workpiece features, and 127 of the spaces between these features, can be used, which involves a total of 255 edges. This is most useful for measuring such things as IC chip leads or connector pins that are approximately equally spaced. This method cannot be applied to transparent objects.
Abnormal data elimination
If a piece of data significantly exceeds the tolerance limit because the workpiece or measuring unit is contaminated by a water droplet, oil droplet or dust, the piece of data will be automatically removed by this function.
Simultaneous (dual-program) measurement
It is possible to measure two items simultaneously with one laser scan micrometer unit, and to output the data. This function can be used to simultaneously measure the outside diameter and runout of a bar that is rotating, or to measure the outside diameters of two cylinders or wires at the same time.
Applications
- Automotive
- Defence
- Electronics
- General manufacturing
- Plastic and rubber
Mitutoyo 544-047 Specifications
| Display | 9-digit LED (for measurement) and 8-digit LED (sub-display) |
| Designation | Segments: Segment 1 to 7 (Segment 1 to 3 for transparent objects) Edge: 1 to 255 edges can be detected |
| Averaging Times | Arithmetical average: Per 1 to 2048 Moving average: Per 32 to 2048 |
| Go/No-Go Judgment | Nominal value ±tolerance setting, upper and lower limits setting, multi-limit setting |
| Measurement Mode | Waiting, single measurement, continuous measurement |
| Statistical Calculation | Available when connecting an external PC via the RS-232C or USB interfaces |
| Data Output | USB2.0, RS-232C and I/O-analog interfaces |
| Operating | Temperature: 32 to 113°F (0 to 45°C) Humidity: 35 to 85% RH (with no condensation) |
| Power Supply | 24 V DC ±10%, 1.3 A (sold seperately) |
| Dimensions | 8.57 x 5.67 x 2.83" (217.6 x 144 x 72 mm) |
| Weight | 3.08 lbs (1.4 kg) |
What's included with the Mitutoyo 544-047
- Mitutoyo LSM-5200 Compact Display Unit, 24 V DC


